The Guide to The Perfect Cost-Effective DIY Blowout

Your hairstylist makes it look easy. We know. But acquiring the perfect blowout is no easy feat for the average beauty-loving babe.
If you've ever tried getting a salon-quality blowout at home, you'll know it's a challenge. Between the tugging, the tangling, and those awful achy arms, it feels like heading to the salon is your only option. It's not.
You can indeed achieve a perfect, cost-effective DIY blowout without dealing with issues like tired arms and tangling. Here's a step-by-step guide on how to do an at-home blowout in the easiest way possible and with the best possible results.
Step #1: Wash and Condition
Any good blowout begins in the shower. You need to use good-quality hair products in order to achieve a flawless DIY blowout. Like with makeup, a good blow-dry is all about the right canvas. If your canvas is prepped to perfection, there's no reason at all why you can't get that Victoria Secret-esque mane you dream about.
Select a shampoo and conditioner duo that's formulated to address your own hair type and concerns. Whether you're dealing with frizz, dullness, lack of volume, split ends, or dryness, a good hair washing routine can help -- provided you have the right products of course.

Got dry or damaged hair? Try our Super Fruit Shampoo + Conditioner. Flat, lifeless strands? Pick up our Super Plant Bundle. And if you've got color-treated hair, try our Super Flower Bundle.


Step #2: Apply a Mask
After washing and conditioning, apply a smooth hair mask through the mid-lengths and ends of your locks. This'll ensure it looks extra smooth, glossy, and healthy -- for a flawless finish!

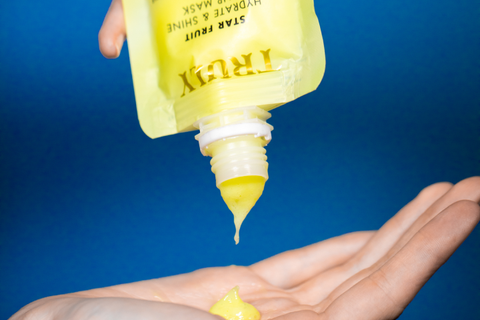
To seal split ends, try our Rainbows in Mirrors Hair Mask. To restore shine, try our Star Fruit Shine Mask. And to hydrate dry strands, try our Coco Rose Milk Mask. Leave it in for 10-15 minutes before rinsing.

Step #3: Prep
Once you're done with the hair washing, conditioning, and masking process, prep your hair for heat styling. First, remove excess moisture with a dry, clean towel, and remember to pat, not rub. You want your hair to be damp but not wet when using your hair dryer to minimize heat exposure time, preventing frizz and breakage. Plus, it'll make the whole process much easier and quicker. In other words: less arm ache!
You can either let it air-dry after towel-drying, or twist your hair up into an absorbent microfiber towel right out of the shower. These towels are great for absorbing moisture and are gentler on your hair than traditional cotton towels.

Once your hair is only slightly damp and blow-dryer ready, comb through your strands with a wide-tooth comb, like our Rose Gold Comb to detangle hair.
Step #4: Spray on Heat Protectant
Now it's time to apply heat protectant to shield your strands from heat damage and control frizziness.
"Heat damage over time can cause breakage throughout and frayed, undesirable ends — sometimes to an extent that cannot be repaired," explains hairstylist Adir Abergel.
Heat protectants seal off the hair's cuticle and consequently help protect it against damage.
Every hair type can benefit from this step, though it's especially important for those with dry hair or color-treated hair, since they're particularly fragile.
Once again, you'll want to choose a heat protectant that's suited for your hair type in order to get the most out of it. Your hair texture and type will determine the type of product you use. For instance, if you have thick, curly hair, you will definitely benefit from a heavy, oil-based protectant while those with fine hair should choose something lighter. Ask your stylist what protectant they'd recommend for your hair type and texture.
Step #5: Set Your Part
"Making your part is sort of setting your intention for the whole look," says celebrity hairstylist Harry Josh. "It seems like an incidental thing, but focus on making your part really intentional and the whole style will benefit."
Step #6: Section Your Strands
Sectioning your hair makes the whole process of hair drying much easier and faster. Plus, it'll make your hair look so incredible at the end.
Divide your hair into four sections -- two in the front and two in the back -- and put each section up in a clip. If you've got super thick hair, you may need to divide it into more sections. Ideally, you want each section of hair to be around an inch wide.
Step #7: Set Out Your Tools
You'll need your favorite hair dryer and hair brush. For a salon blowout, always use a round brush -- it works for all hair types! You can also try the Dyson air wrap if you want to make things easier for yourself, but you can just as easily achieve the same results from your regular dryer. That's what your hairdresser probably uses anyway.
Step #8: Start Blowdrying
Starting at the lower back of your head, unravel a section of hair, roll it around the brush, and apply heat. Keep the nozzle down to avoid frizz and flyaways. Then repeat this process section by section until your whole head is finished. And make sure you're using a medium to low heat setting, instead of high, to save your strands from becoming frazzled.
According to Josh, you always want to do the hard stuff first. "If you do the easy pieces in the front first, you’ll lose steam before you get to the back and you won’t be as thorough," he explains.
For extra bounciness, dry your hair forward over your head and then go back over the sections with a blast of cool air.
Step #9: Apply Finishing Oil or Cream
To hydrate and add shine to your strands, apply a dime-sized amount of leave-in finishing oil or cream onto your lengths and ends.
Whether you've got short hair, long hair, straight hair, or curly hair, every hair type, length, and texture can follow this blowout tutorial.
You can also elevate your look with a flat iron or curling iron to add twists or curls to your strands -- whatever hairstyle floats your boat!
In the meantime, make sure you focus on good hair care practices to keep your locks healthy in-between blowdrying sessions. Salon tip: Prolong your blowout with a few mists of dry shampoo!